How to Plant Germinated Seeds Successfully
Understanding Germinated Seeds
How to plant germinated seeds – Germination is the process by which a seed begins to sprout and grow into a seedling. Understanding the characteristics of a successfully germinated seed is crucial for successful planting and subsequent growth.
Planting germinated seeds involves gently placing them in prepared soil, ensuring the root faces down. This differs slightly from the overall process of how to plant from seeds, which you can learn more about by checking out this comprehensive guide: how to plant from seeds. Understanding the initial stages of seed germination helps optimize the planting process for germinated seeds, leading to healthier seedlings.
Characteristics of Germinated Seeds
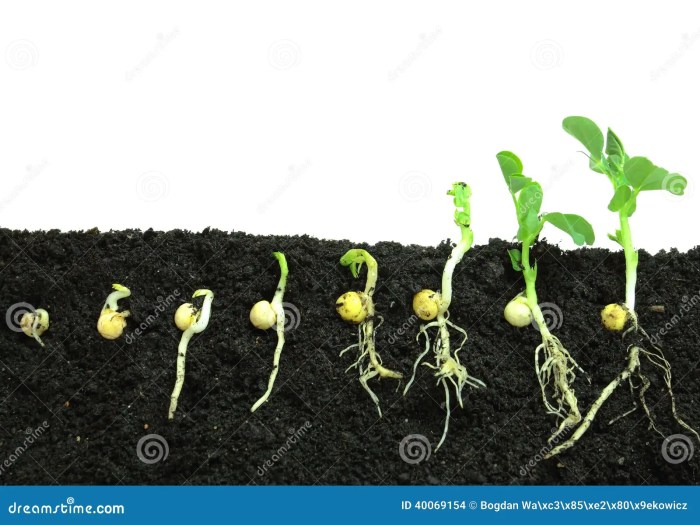
A successfully germinated seed exhibits visible signs of growth, primarily the emergence of a radicle (embryonic root) and a plumule (embryonic shoot). The seed coat may be cracked or split open. The seed itself will generally appear swollen and more plump than its ungerminated counterpart due to water absorption.
Germinated vs. Ungerminated Seeds
The key difference lies in the presence of visible growth. Ungerminated seeds remain dormant, showing no signs of root or shoot emergence. They retain their original size and shape, while germinated seeds exhibit noticeable swelling and the development of the radicle and plumule.
Visual Description of a Germinated Seed
Imagine a bean seed: initially, it’s a dry, firm oval. After germination, the seed coat will likely crack, revealing a small, white root (radicle) emerging from one end. At the opposite end, a tiny shoot (plumule) will begin to develop, pointing upwards. This shoot will eventually develop into the stem and leaves. Similar patterns are observed in other seeds, though the size and appearance will vary.
| Seed Type | Radicle Appearance | Plumule Appearance | Seed Coat Changes |
|---|---|---|---|
| Bean | Thick, white, and rapidly elongating | Small hook-shaped structure | Cracked or split open |
| Tomato | Fine, white, and somewhat delicate | Small, pale green structure | Often remains largely intact, but may show cracks |
| Flower (e.g., Sunflower) | Thin, white, and relatively long | Small, pale green structure with visible cotyledons | May be pushed open or partially removed by the emerging radicle and plumule |
Choosing the Right Planting Medium
The planting medium plays a vital role in providing the necessary environment for germinated seeds to thrive. Selecting the right medium ensures proper drainage, aeration, and nutrient supply.
Ideal Properties of a Planting Medium
An ideal planting medium for germinated seeds should be well-draining to prevent root rot, yet retain enough moisture to keep the seeds hydrated. It should also be well-aerated to allow for proper root development and oxygen uptake. Finally, it should provide essential nutrients for initial seedling growth, although this is often supplemented with fertilizer later.
Comparison of Planting Media

Source: dreamstime.com
Several options exist, each with its advantages and disadvantages. Potting mix, seed-starting mix, and coco coir are commonly used.
| Planting Medium | Pros | Cons |
|---|---|---|
| Potting Mix | Readily available, generally good drainage and aeration | Can be heavy, may contain fertilizer that is too strong for seedlings |
| Seed-Starting Mix | Lightweight, excellent drainage and aeration, often sterile | Can be more expensive than potting mix, may dry out quickly |
| Coco Coir | Sustainable, excellent water retention, good aeration | Requires pre-soaking, may need additional nutrients |
Planting Techniques for Germinated Seeds
Planting germinated seeds requires a gentle touch to avoid damaging the delicate root and shoot. The depth and spacing of planting will vary depending on the type of seed.
Step-by-Step Planting Process, How to plant germinated seeds
- Prepare the planting medium, ensuring it’s moist but not soggy.
- Gently create small holes or depressions in the medium, deep enough to comfortably accommodate the seed’s root.
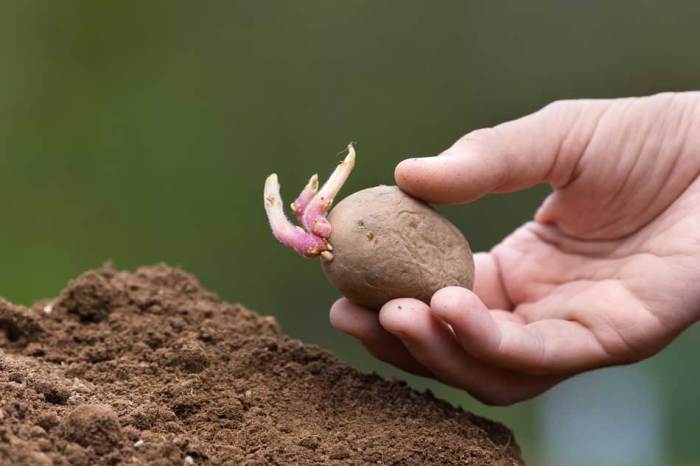
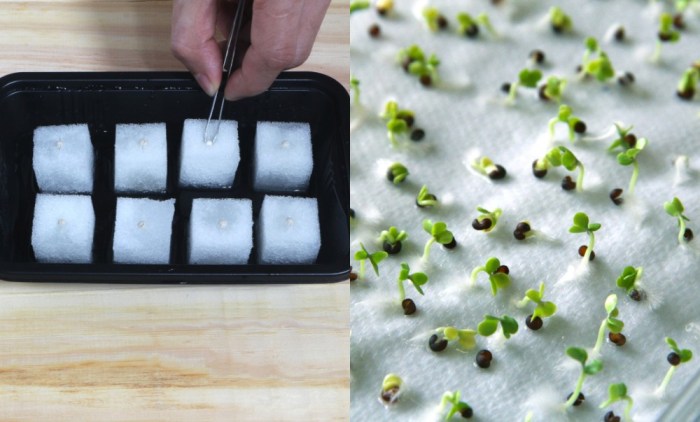
- Place the germinated seed in the hole, ensuring the root points downwards.
- Carefully cover the seed with the planting medium.
- Gently water the planted seeds.
Planting Methods
Direct sowing involves planting the seeds directly into their final growing location. Transplanting involves initially planting seeds in seed trays or small containers and later moving them to larger containers or the garden.
Tools and Materials
- Seed starting mix or other suitable planting medium
- Seed trays or small pots
- Watering can with a fine rose
- Small trowel or spoon
- Germinated seeds
Providing Optimal Growing Conditions: How To Plant Germinated Seeds
Maintaining the right balance of light, temperature, and humidity is crucial for healthy seedling development. Consistent watering is also essential.
Optimal Growing Conditions
Most germinated seeds thrive in temperatures between 65-75°F (18-24°C). They need bright, indirect light, avoiding direct sunlight, which can scorch delicate seedlings. High humidity (around 50-70%) helps prevent the seedlings from drying out.
Consistent Watering
Keep the planting medium consistently moist but not waterlogged. Overwatering can lead to root rot, while underwatering will cause wilting and stunted growth. Check the moisture level regularly by touching the soil; if it feels dry to the touch, it’s time to water.
Creating a Suitable Microclimate
A simple humidity dome can be created using a clear plastic bag or a humidity tray. For a humidity dome, place the seed tray inside a clear plastic bag, sealing it loosely to allow for air circulation. A humidity tray involves placing the seed tray on a tray filled with pebbles and water; the evaporating water increases humidity around the seedlings.
Visualize a clear plastic dome covering the seed tray, creating a mini greenhouse effect, or a seed tray sitting atop a shallow tray of water-filled pebbles, maintaining consistent moisture.
Seedling Care and Development
Monitoring seedling growth allows for early detection of problems and timely intervention. Recognizing signs of healthy growth and common issues is crucial.
Signs of Healthy Seedling Growth

Source: simplifygardening.com
Healthy seedlings exhibit strong, upright growth, vibrant green leaves, and a healthy root system. They should be actively growing and developing new leaves.
Common Seedling Problems
Damping-off, a fungal disease, is a common problem, causing the stems to rot near the soil line. Nutrient deficiencies can lead to stunted growth and discoloration of leaves. Overwatering or underwatering also cause problems.
| Problem | Cause | Solution | Prevention |
|---|---|---|---|
| Damping-off | Fungal infection, often due to overwatering or poor ventilation | Remove affected seedlings, improve ventilation, use a fungicide (if necessary) | Use sterile planting medium, avoid overwatering, ensure good air circulation |
| Nutrient Deficiency | Lack of essential nutrients in the planting medium | Apply a balanced fertilizer specifically formulated for seedlings | Use a nutrient-rich planting medium, fertilize regularly (following product instructions) |
| Overwatering | Excessive watering leading to root rot | Allow the soil to dry slightly between waterings, improve drainage | Water only when the top inch of soil feels dry |
| Underwatering | Insufficient watering leading to wilting and stunted growth | Water thoroughly when the soil feels dry, ensure consistent moisture | Monitor soil moisture regularly and water as needed |
Transplanting Seedlings

Source: ruralsprout.com
Once seedlings have developed a few true leaves, they are ready for transplanting. Hardening-off is a crucial step before moving seedlings outdoors.
Transplanting Process
- Gently loosen the soil around the seedling’s roots.
- Carefully lift the seedling from its container, ensuring the root ball remains intact.
- Prepare a new hole in the larger container or garden bed.
- Place the seedling in the hole, ensuring the top of the root ball is level with the soil surface.
- Fill the hole with soil, gently firming it around the seedling.
- Water thoroughly.
Hardening-Off
Hardening-off gradually acclimates seedlings to outdoor conditions. This involves gradually exposing them to more sunlight, wind, and temperature fluctuations over several days before transplanting them permanently outdoors.
Imagine gradually increasing the time seedlings spend outdoors, starting with a few hours of shade and progressively moving them to sunnier locations over a week or two. This allows them to adjust to the harsher environmental conditions.
Essential Questionnaire
Can I plant germinated seeds directly outdoors?
It depends on the plant type and the climate. Some hardy plants can be directly sown, while others benefit from the protection of starting indoors before transplanting.
What should I do if my seedlings are leggy?
Leggy seedlings are often a sign of insufficient light. Move them closer to a light source or supplement with grow lights.
How often should I water germinated seeds?
Keep the soil consistently moist but not soggy. Overwatering can lead to root rot. Check the moisture level daily and water as needed.
My seedlings have yellowing leaves. What’s wrong?
Yellowing leaves can indicate nutrient deficiencies or overwatering. Check your watering schedule and consider using a balanced fertilizer.


